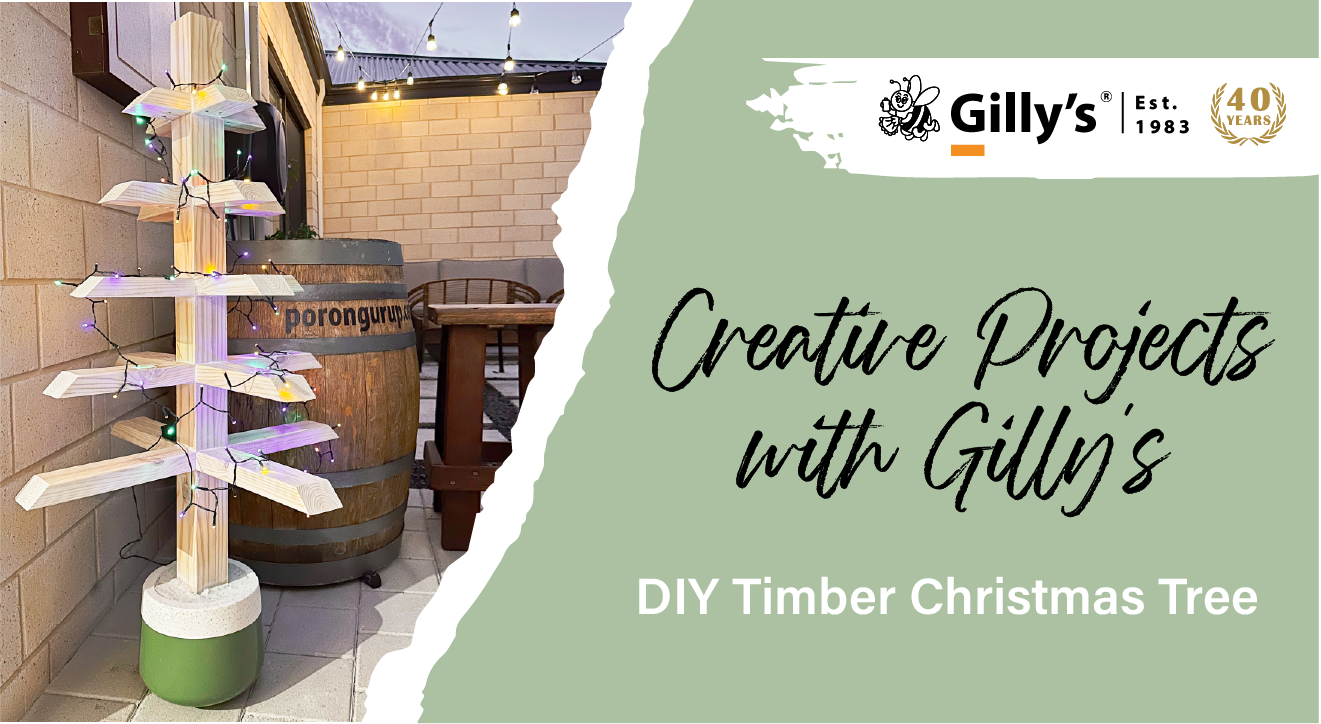
Read through our guide on how to create an outdoor timber tree to bring some Christmas cheer to your yard this year! During this time of year with the Christmas lights and decorations up, it brings so much joy to our household. It’s always lovely having a view of the tree and other decorations while sitting in the lounge or enjoying dinner. Outdoor Christmas decorating can be hard and during the summer we love sitting out in the alfresco to have dinner, so we thought creating an outdoor tree would be perfect.
What you will need:
1 x 250ml Gilly’s Alfresco Timber Oil.
2 x Lint free polishing cloth (we used Gilly’s Bamboo Polishing Cloth).
1 x 216mm sliding crosscut mitre saw KGS216M by Metabo (SKU 9301955 at Beyond Tools).
1 x Planter pot (we used a 23x20cm Pot from Bunnings I/N 0357840).
1 x Pine FJ LAM DAR 70x70cm 1.2m (I/N 0262328 at Bunnings). TRUNK
5 X Pine shorts 70x35mm 1.1m (I/N 0098688 at Bunnings). BRANCHES
40 X Screws (we used some we already had which were Countersunk Head 10G 50mm).
1 x Bag of concrete (We used Westbuild 20kg Kwikset concrete I/N 0760207 at Bunnings).
1 x Box of solar fairy lights (We used Lytworx 100 Multicolour LED 2 Function Solar Fairy Lights from Bunnings - I/N 4351602).
1 x Tape measure.
1 x Pen or pencil.
1 x Drill with a drill bit a size or two down from the screws used.
Step 1: The first step is to make the ‘branches’ by cutting the Pine shorts to size using the Metabo saw
You will need to cut:
4 x 10cm lengths.
4 x 15cm lengths.
4 x 20cm lengths.
4 x 25cm lengths.
4 x 30cm lengths.
We did an angled cut on one end of each piece so that the end of each ‘branch’ is angled downwards.

Step 2: Attaching the ‘branches’ to the tree ‘trunk’
The timber ‘trunk’ will be the 70x70cm piece of timber that is 1.2m tall.
Measure out where each branch will sit and draw a line using your pen or pencil where the middle of each ‘branch’ will sit. We measured 16cm apart to the centre of each ‘branch’.
It can get tricky as you drill each piece on, so we started at the top and worked our way down attaching each branch. It is also handy to have two tables so you can rest each side of the trunk on each table allowing you to have the tree flat while drilling each branch on.
Using your drill bit, drill two holes on the underside of the straight cut side of the timber where it will attach to the ‘trunk’. Then place the timber where it will be attached and drill in again so that the holes go through to the ‘trunk’.
Then screw into each hole attaching the branches. We attached all 4 x 10cm, followed by all 4 x 15cm etc. Until all branches were attached from top to bottom.

Step 3: Oiling the tree
Using Gilly’s Alfresco Timber Oil give the tree a good oil, making sure it soaks it up. Apply generously using a lint free cloth (we used Gilly’s Bamboo Polishing Cloth). We applied 3 coats. Pine is quite porous, so it could have benefitted from another coat or 2, but the addition of Lime Wax in Step 5, boosts protection as well.
Gilly’s Alfresco Timber Oil is a tung oil-based finish for outdoor timber and furniture. It has added UV protection to withstand the harsh sunlight we receive in Australia! With that said, it is best used for timber that is protected, eg. under alfresco, shade cloth and verandas.
The formula is built around natural oils such as tung oil which helps to seal timber and protects it from water damage and other wear. It is a great product to seal and finish new timber, but also to revive older timber that is looking dry and worn.
This oil contains no lacquer or silicone, unlike many products on the market, which means easier maintenance for you and a beautiful natural finish.


Step 4 : Concreting the tree in the pot
Now that the tree is complete it’s time to mix up your concrete accordingly and pour around the tree in the pot to secure it in place. We used a quick setting concrete which we mixed some white oxide into to lighten the concrete. The concrete was mixed with a mixing drill then shovelled into the pot, we used a cloth to smooth out the cement as it was quite lumpy.
*We used Gilly's LoThin to clean up any spilled concrete on the pot edges to tidy it up*

Step 5: Waxing the tree
Using a lint free polishing cloth (we used Gilly’s Bamboo Polishing Cloth) apply Gilly’s Lime Wax. We chose to apply the Lime Wax (which is a white effect wax) to avoid too much yellowing in colour that is common with pine without losing the natural timber colouring. We applied the wax heavily in each gap where the timber meets to try fill in those grooves for a more appealing finish. The wax was left on the tree overnight and buffed back the next day to get rid of the excess.
Unique blend of natural and renewable waxes, oils and titanium dioxide. Use as an initial coat of wax on raw timber to provide a whitewashed look. Alternatively, you can use it over another finish to add a liming effect. Excellent over chalk paint finishes.


Step 6: Decorate!
The last step (which is optional) is to decorate! We decided to wrap some colourful lights around the tree for it to glow in the evening. We used solar powered lights so that our tree could remain easily portable. You can also add a star or a Santa hat to the top of the tree and decorate each branch with other Christmas decorations and ornaments.

