
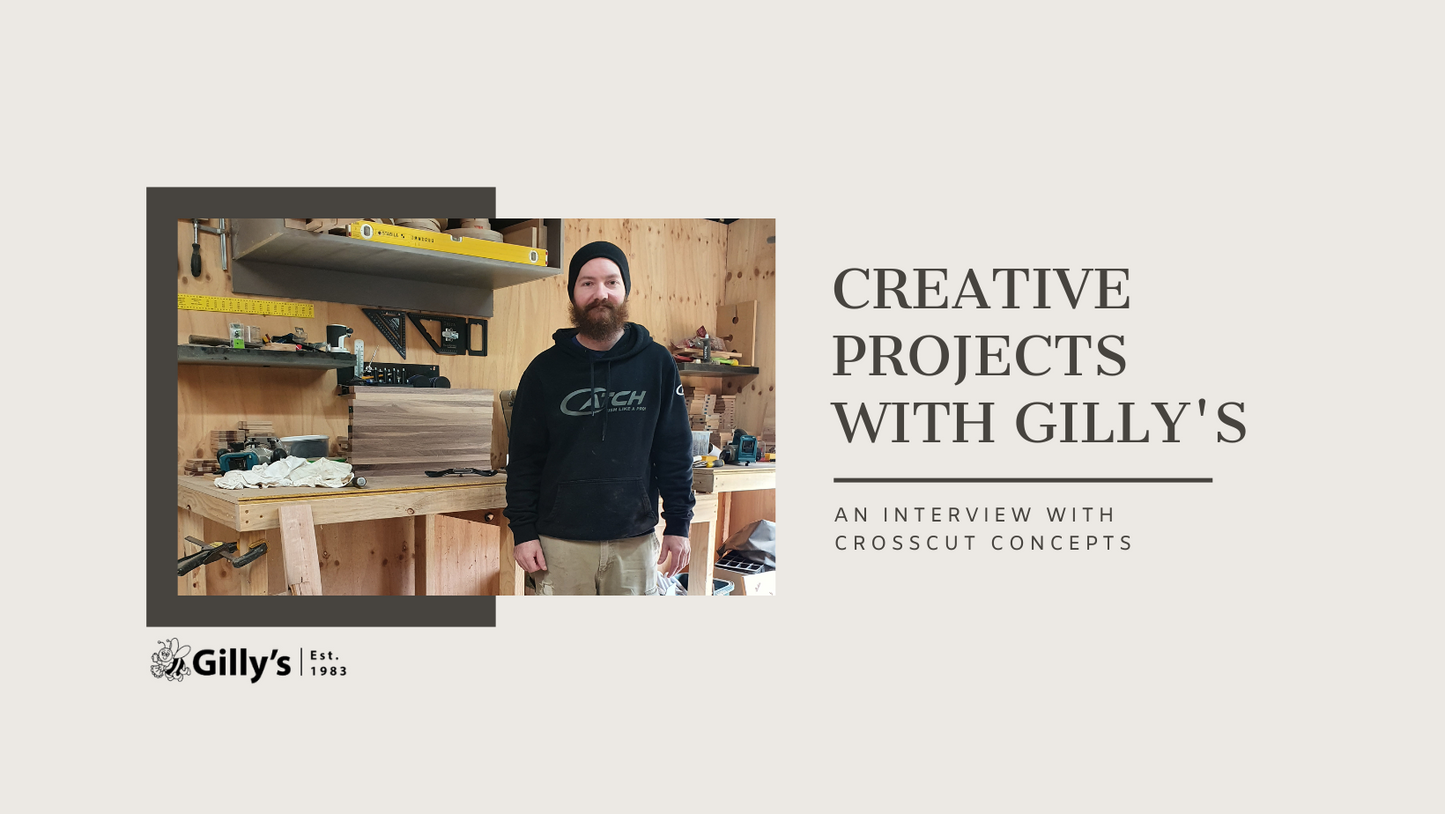
We spoke to Shane of Crosscut Concepts (in his workshop below) about his latest creative project.

Please tell us a little about you and your business, (inspirations, ethos – whatever you would like to share). We’d love to hear about how long you’ve been involved with what you’re doing and what inspired you to take this career path and when.
I have been a cabinetmaker/furniture maker for over 17 years, mainly making kitchens but my real passion was using real timber so, I started my business in 2020. After deciding that, I think it was the right time to go out on my own and support my family doing what I love.
I left school at the age 17 and starting my cabinet/furniture making apprenticeship 3 days later. I discovered my passion as a child watching and helping my grandfather doing woodwork in his garage. And, as he recently passed earlier this year in his 90s, it has definitely inspired me to keep pushing and strive for success.
How long have you been using Gilly’s products and how did you first come across them?
I first found Gilly’s products when I was looking for Australian made products to use on my timber products I create. And have been very satisfied with the results.
Is there any particular product you prefer to work with and if so, could you explain why?
The Gilly’s product I use and prefer the most is probably the Chopping Board Oil; I like using it as it doesn’t leave any residue unlike some other manufacturer's products as well as the durability and finish you can achieve with it. And the scent is very pleasant as well; it pretty much can be used on any raw timber items.
Could you tell us about what you are working on right now and give us a step by step guide on how you are making it and then, how you are using the particular Gilly’s product(s) that you have chosen for the project? Please feel free to include other manufacturer’s products that you use in the process. We love to hear about different techniques.
Here is the process for a couple of American walnut chopping boards I made recently:

Step 1: Rough sawn American black walnut

Step 2: Progress after machining and glue up
Water or denatured alcohol is sprayed over the timber to 'raise the grain' prior to sanding. This ensures a smoother result when the oil is applied later.
Once dry, the board is sanded to 320 grit
Step 3: Above and below - cut square and edges routed

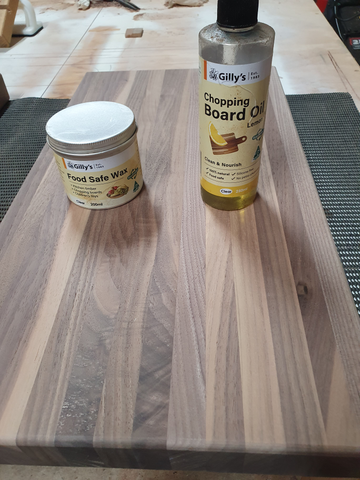
Step 4: Products used to treat and polish the chopping boards - Gilly's Food Safe Wax and Lemon Chopping Board Oil. Below, application of Chopping Board Oil.
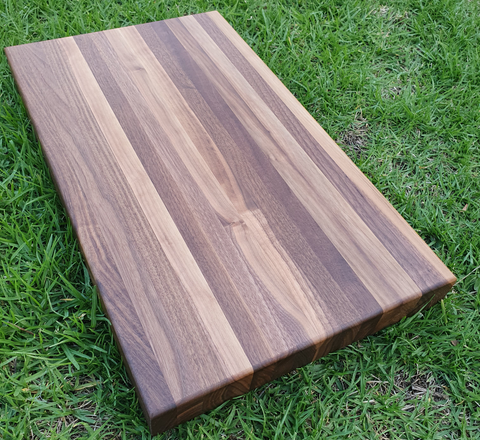
Step 5: Completed chopping board; oiled and waxed
Do you have any tips and tricks pertaining to Gilly’s products that we haven’t included in our own material? We often have people contacting us with some really innovative uses of our products!
- Apply a generous amount Gilly’s Chopping board oil and leave for a minimum of 12 hours to let the board absorb all the goodness.
- Orange Oil can be used to touch up and scratches or marks on timber floors, furniture and architraves.
- Using Chopping Board Oil/Liquid Beeswax and Orange Oil as a medium in a wet sanding process.
Find out more about (and purchase) Shane's beauiful timber creations at Crosscut Concepts and here on Facebook and Instagram